Building RC Planes
Building RC planes may sound pretty intimidating. But trust me, if I can do it, anyone can do it. All it takes is some patience, the right tools, and some spare time. The detailed instructions and included plans that come with an RC airplane kit take you through each step of the building process.
 A good way to get your feet wet is to assemble an ARF before attempting to build from a kit. But that's not absolutely necessary as tons of people simply jump right in and build a kit for the very first airplane. |
There's no question that building RC planes from a kit can be very time consuming and and it takes a lot of work. All that work pays off when you finally get to show off your new bird to all the guys at the flying field! After spending weeks transforming a pile of balsa into a beautiful creation that's truly yours, you prepare for the maiden flight...The feeling in your gut is fear, excitement and pure adrenaline! |
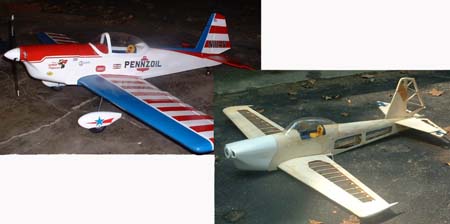
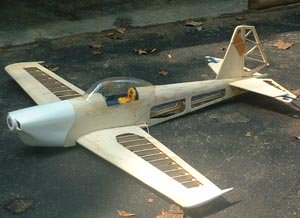
I'm going to give you a taste of what is involved with building RC planes by sharing how I transformed my Carl Goldberg Super Chipmunk from a pile of balsa through its maiden flight!
Tools and Supplies
There are a few basic tools and supplies required for building RC airplanes. As you gain more experience you will soon find that there are many cool gadgets and tools available that will make building much easier and faster.
For now, these are the bare essentials you'll need for getting started.
|
Building Board Electric Drill w/ Complete Set of Bits Straight edge Carpenters Square Wood File Pliers |
Screwdrivers X-acto® Razor Saw Hobby knife, #11 Blades Dremel Too Sanding Block Sandpaper CA and Epoxy Glue |
Wire Cutters String Masking tape Balsa Wood Filler Covering Sealing Iron Heat Gun |
Choosing Your Work Area
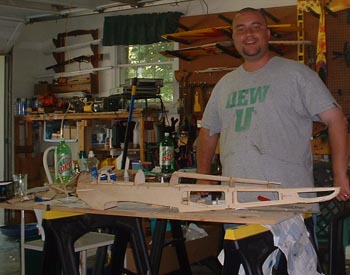
The adhesives used for building RC planes require a well ventilated area. Believe me, you dont want to fill your home with these fumes. Building RC planes requires quite a bit of gluing, cutting, and sanding. In other words, it gets quite messy! The best place to build your radio controlled airplane kit is in the garage...
You need to have a work bench of some type. Most garages have some type of work benches already. As you can see in this wonderful picture of, I simply lay my building board across a couple of saw-horses.
Yep, I'm a Dew addict...
|
You will need a completely flat building surface that you can stick T-pins into. Most people use a building board. Like the board in the picture above, this is a completely flat board made specifically for building RC planes. Some people turn ceiling tiles upside down to use for a building surface. Whatever you choose must be completely flat and you have to able to pin the plans to it. If you buy a building board made specifically for building RC planes, you can rest assured that your wing will be straight. |
|
Organize All The Pieces First
Organization is the key for building RC planes efficiently. There are tons of pieces and it's not much fun hunting for that piece you need if everything is a mess!
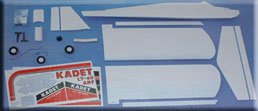
Start by labeling each part with a felt tip pen. Each part is identified in the manual and/or plans. Read the directions through, and organize all of the pieces accordingly. You'll have a pile for the wings, fuse, stabilizers, etc.
It's also a good idea to use some plastic baggies to keep from losing the smaller parts.
Tail Surfaces, Fuselage and Wings
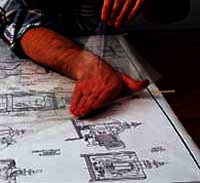
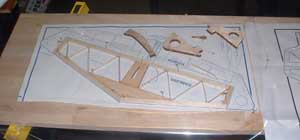
You start by pinning your plans to the building surface. You then cover the plans with a plane protector to keep the glue from ruining them.
are clear plastic sheets that resist modeling glue.
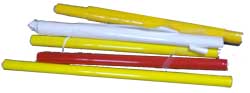
Most every piece of the radio controlled airplane kit comes from a die-cut sheet of balsa wood. The exception being the sticks/sheets of balsa and basswood that must be cut to length. Building RC planes from kits is a lot like putting together a puzzle.
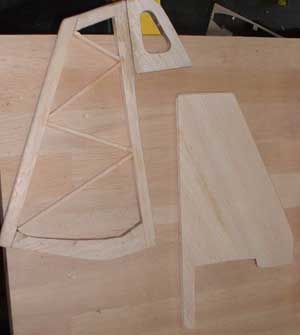
The construction of the horizontal and vertical stabilizers is very straight forward. You just pin the balsa pieces in place right on top of the plans. It's kind of hard to mess that up!
|
|
Once in position, you glue each piece together using thin cyanoacrylate glue (CA Glue for Short). With the exception of a little trimming and sanding, that's about all there is to it! |
CA glue is some very amazing stuff. If you're not careful you'll have your fingers glues together in an instant. If you're not familiar with it please take the time to read about model airplane glue before going any further.
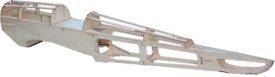
Building the fuselage is a bit more involved, but simple none-the-less. As with the tail, you also use the plans as a guide for positioning the pieces initially. Then you follow the directions for install the formers, gluing on the sheeting, and sanding to the final dimensions.
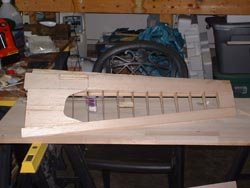
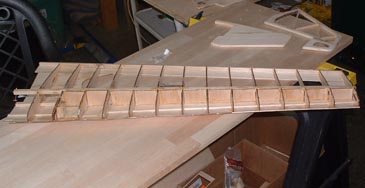
In my opinion, building the wings is the coolest part about building RC planes. It's also much easier than you may think! The wing halves are built by pinning the wing spares and balsa sticks on top of the plan just as you do with the horizontal and vertical stabs.
The directions lead you through each step from gluing the parts together, installing sheeting, and sanding to perfection...
 |
 |
Once both wings are completed they are glued together in the center with 30 minute Epoxy glue for strength.
It's extremely important that the wings are aligned perfectly while the glue cures, or else you'll have an airplane that tracks crooked. Or worse yet, a crooked wing may not even bolt to the fuselage properly...
Using slow curing epoxy glue allows you to tweak and adjust the wings halves until they're positioned just right before the glue sets up. It usually takes some crafty and creative rigging to keep the wings held together straight and firmly while the glue cures over night.
Building RC planes is a fairly straight forward process of following the directions to a "T".
Taking your time and paying attention to detail is key. It's not fun when you get in a hurry and mess up and have to redo certain steps. Yes I speak from experience.
If you do get careless and make a mistake, it's not the end of the world. I've made some fairly large boo-boos while building RC planes.
You can almost always correct your mistakes, it just causes a lot of frustration and unnecessary work. As with most things in life, it's always easier and quicker in the long run to take your time and get it right the first time!
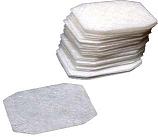
Covering the Airplane
Much like a full scale airplane, the frame of the airplane is covered with a
thin plastic covering. There are a few brands of covering, one of the most popular being Monokote. The covering adheres to the frame by means of heat, similar to shrink wrap.
|
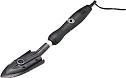
The covering is cut to the correct shape and laid across the frame. A special sealing iron is ran over the covering in the same way a shirt is ironed. This iron is adjustable and doesn't get nearly as hot as a standard household iron. For this reason it is important that you buy a
sealing iron |
|
|
On flat solid surfaces, such as the sides of the fuselage, a sealing iron is all that is needed. Simply keep running over the wrinkles with your sealing iron until the surface is smooth. Just be careful not to leave the iron in one place too long as it will melt the covering... When covering open areas, such as in between wing spars, a special
heating gun |
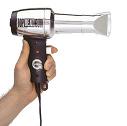
|
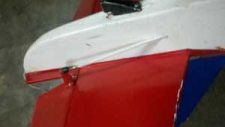
The wings, fuselage, and tail surfaces are covered before final assembly. This is where you can make your plane really stand out from the crowd by choosing or designing any type of covering scheme your heart desires!
When building RC planes it's important to understand that key to a great covering job is a great finishing job on the wood! Make sure every surface is sanded smoothly and free of surface defects before covering. If there are any defects, they WILL show through the very thin covering of your new RC airplane.
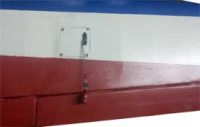
Painting RC Airplanes
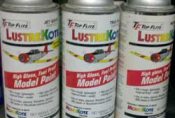
I actually used a paint called
LustreKote by Top Flite
for painting the red and blue portions of my Chipmunk.
Per LustreKote's recommendations, I took steel wool to the areas of the covering to be painted. I applied a base primer coat, followed by the color coat, then finished off with a clear coat to make her shine!
I am really proud of how she turned out. But after several flights I have some spots where the paint is beginning to flake. I'm not really sure what I did wrong, perhaps I didn't rough up the surface enough with the steel wool. Or maybe I applied the paint too thick?

Hinging the Control Surfaces
When building RC planes the moveable flight control surfaces must be hinged to the airplane so that they can move up and down freely. There are a few different types of hinges available. The three types below are the most common types of hinges used with radio controlled airplane kits.
CA Hinges
|
CA hinges Slots are cut into both the control surface and the mating portion of the airplane where the CA hinges are inserted. Once the control surface is lined up properly, a few drops of thin CA are applied to the center of the hinge. The CA "wicks" to the ends of the hinges forming a strong bond with the balsa wood. |
|
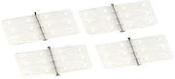
Pinned Hinges
|
pinned hinges Epoxy glue is used to install these hinges. The tricky part about installing pinned hinges is keeping the glue off the hinge pin! Installing pinned hinges is a little more trouble than installing CA hinges. It may be worth your time as pinned hinges are more reliable than CA hinges. |
|
Pivot Point Hinges
|
Pivot point hinges These fingers or points have barbs that help to form a secure bond. Robart makes what are called
hinge point pockets |
|
Control Linkages and Electronics
Now it's time to install the brain and muscles into your creation! Control horns are attached to each control surface with screws.
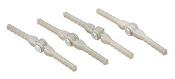
The control horn is then attached to a push rod that is driven by a servo. There are a variety of push rods used with radio controlled airplane kits.
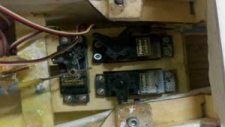
The throttle, rudder and elevator servos are installed into a servo tray that is glued into the fuselage near the wings. The receiver and batteries are also firmly secured in this area.
The elevator and rudder pushrods usually consist of a steel rod ran through a stationary plastic outer tube. The outer tube is glued into the fuselage and exits the fuse near the tail. The steel rod is attached to the control horn of the elevator (or rudder) on one side, and the servo at the other end.
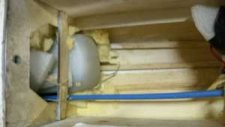
The throttle pushrod can be a bit tricky because the fuel tank is usually in between the servo tray and engine's carburetor. If you're lucky, you may be able to use a straight push rod like is used with the tail control surfaces.
Depending on the particular airplane, you will more than likely have to use a
cable push rod
to get around the fuel tank. A flexible outer tubing is ran from the servo, around the fuel tank, and through the firewall. A small cable is ran through the outer tube connecting the carburetor control arm with the servo.
Smaller airplanes can get away with using one servo to control both ailerons. The entire length of both ailerons are notched where it meets the wing. An aileron rod is glued into this notch. This rod is bent 90 degrees at the center of the wing. A control horn is attached to the bent portion of the rod.
A short control rod connects the servo with the aileron rod. Since ailerons always move opposite of each other, each aileron is attached to opposite sides of the servo arm mounted in the center of the wing.
Larger airplanes must have one or more servos for each side of the wing. These servos are mounted directly on the wing. A small control rod attaches the servo to a control horn mounted to the control surface.
Installing the Power Plant
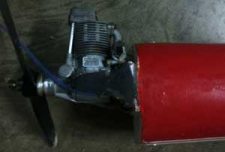
Whether you're installing a motor or an engine, alignment is the most critical aspect of installing the power plant for radio controlled airplane kits. Installing a motor is fairly straight forward as there are no fuel lines or control rods to worry about.
There are several things to be considered when mounting an engine. You have to determine the best orientation for the engine and determine how the exhaust will be routed. The control linkages from the servo must be installed. The fuel tank and tubing must be installed.
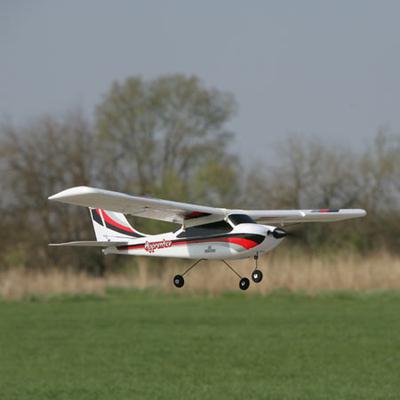
Reaping the Rewards!

The most rewarding part of building RC planes is showing up to the flying field with your shiny new bird. After all those many hours of gluing, sanding, covering, painting, tweaking; it's time to reap the fruits of your labor!
You feel like a proud poppa as your flying buddies help you do a once over to make sure she's ready for flight.
Finally, the moment arrives when you're ready to see your creation rise to the sky for the first time. I had only been flying for a season or two when it was time to Maiden my Chipmunk. I was a bit scared, so I let my buddy Tom have the honor of the maiden flight.
More pages related to building...
- Different RC Airplane Forms
- Warbird RC airplane plans
- Free Model Airplane Plans
- Model Airplane Glue
- Model Airplane Decals
Home › Building RC Planes
Let’s Go Flying! |
|
5 Steps for Successful First Flight! When the RC bug bites, it bites hard! Control yourself my friend! Save yourself much time and money by following these five steps to success! |

|
Follow us on: |
|