Thermal Gliding Basics
Thermal gliding is all about catching rising columns of air and riding them high as possible. This rising column of air is referred to as "lift". When it comes to gliding, there are two types of lift which are ridge lift and thermal lift.
Ridge lift comes from the wind swooping up the side of a hill. RC thermal gliders use lift from rising columns of warm air called thermals.
What Exactly is a Thermal?
In a nut shut, thermals are rising columns or pockets of air that are caused by uneven heating of the ground surface. Thermals can rise as high as several thousand feet into the air!
As you know, different color object absorb more heat from the sun than others. One a hot sunny day you'll notice the surface temperature of asphalt is much higher than the grassy area next to it.
Naturally occurring thermals will most likely form over sandy or rocky surfaces, freshly plowed fields, or any place where the surface is likely to be hotter than its surroundings.
As you can see from the above image on the right, thermals actually drift with the wind which makes them even trickier to spot and ride.
Best Conditions for Thermal Activity
You will find the strongest thermals when the sun is at its highest on nice sunny day.

The strength of thermals is directly proportional to the variation of surface temperature. This means the strongest thermals are most likely to occur on a warm sunny day after a relatively cool night.
The presents of nice pretty cumulus clouds is a sure sign that conditions are right for thermals. As a matter of fact, thermals are what cause the formation of cumulus clouds.
Full scale glider pilot actually study the shapes of these cumulus clouds to help determine the most likely place to find strong thermal activity!
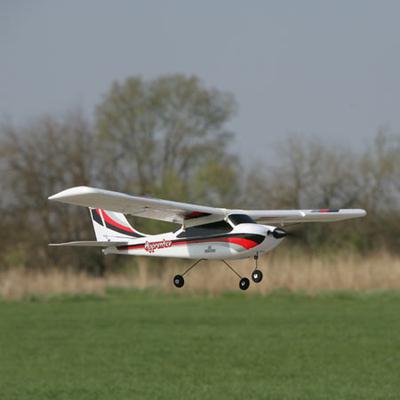
Choosing an RC Thermal Glider
As you can probably imagine, the lift associated with thermals is generally much less than the lift seen on the slopes. For this reason RC thermal gliders require extremely light airframe.
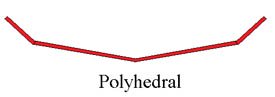
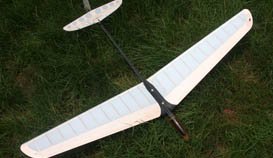
RC thermal sailplanes are usually polyhedral shaped gliders with rudder and elevator control. Polyhedral wings have a relatively wide wingspan with the tips angled upward slightly for stability.
Discus Launch Gliders are the most popular type of thermal gliders these days. They are launched like by handy by swinging around and releasing much like a track and field discus.
These are built very light, but are designed to take the side forces associated with discus launching.
Be careful with what RC gliders you try to discuss launch though. Some of the older style thermal gliders are not built to withstand the side forces. You will have to use the old fashion overhand "javelin style" technique to hand launch these RC gliders. Or you could use a hi-start or winch as described here.
The Art of Finding Thermals
The challenge of finding and riding thermals is the very essence of thermal gliding.
It's nothing short of awesome when you first manage to keep your glider in the air for hours without landing. Watching your bird ride a rising current of air until it becomes a tiny spec in the air is priceless!
It's always best to wait for a sunny warm day with very little wind. As Murphy's Law would have it, those types of days rarely exist when you have the free time to fly... But you do get lucky now and then!
Finding thermals is very much like fishing. With fishing you cast and watch the "bob" for any signs of a bite. With thermal gliding you launch and watch the glider for any signs of a thermal.
As with fishing, it may be several launches before you get a bite. Or you may bet a bite every cast, you just ever know...
If there is a breeze you will want to launch your glider into the wind, as with any aircraft. Once in the air the best technique is to slowly glide back and forth as the wind blows fresh new air towards you.
Try to keep the side of the glider facing you as it makes it easier to observe for reaction to a thermal. When thermal gliding, it's very important to concentrate on keeping the wings nice and level for maximum lift.
Make sure the rudder is trimmed for the glider to fly nice and straight. Watch the glider very closely for quirks or twitches. If the glider suddenly veers to one direction or the other you know that a thermal is near.
The next step is to observe the glider very closely as you make broad circles around the area where you got a "bite". Pay very close attention the portions of the circle where the glider rises. Make tighter and tighter circles around the area of lift.
Keep in mind that the thermal will drift in the direction of the wind, so you have to allow your glider drift along with the thermal. Once she starts drifting downwind too far you will have to head back by leaving the thermal in search of another.
With enough practice and the right conditions you will be able to repeat the process over and over staying in the air almost indefinitely!
If you're new to thermal soaring, you're best bet is to fly with someone who's good at it. Let them find the thermals with their glider and follow them with yours.
More on Radio Controlled Gliders...
Home > RC Gliders > Thermal Gliders
Let’s Go Flying! |
|
5 Steps for Successful First Flight! When the RC bug bites, it bites hard! Control yourself my friend! Save yourself much time and money by following these five steps to success! |

|
Follow us on: |
|